Hello, welcome to my ramblings and musings. This is a one off post. My main blog is:
here.
This is a quick guide to point you on the way to doing 3d art and making it a 2d illustration. It's not detailed, but an overview.
If you're a traditiional artist who wants to make the move to CG work, then take my advice:
don't!
Just imagine, you'll never have the joy of holding your work in your hands, never be stunned by how much oil paint you got in your hair; when you are dead your CG work will only exist in etherspace for a while, then by sucked into the cosmos. Your great grandchildren will have nothing to hang on the wall, nor will some complete stranger living in the year 2096 be looking at your unsigned work wondering on its providence.
Mind you, your work might be published in a book - you could be the next Maurice Sendak, but I guess it's not the same as hanging it on a wall, plus he is always complaing how rich he is from Where the Wild Things ....
By the way, I mose well apologise for my lousy spelling now. All words look the same to me as far as pslling goes,.... err I mean 'spilling'.... Hmm. English is my second language. Australian is my first.....
That said, if you don't take my advice, then here is the way to do it if you are interested in learning 3d work and turning it into 2d illustrations. (illustration being an 'illumination').
Of course if you are a practicing artists you already have a big advantage on most people learning CG (Cg meaning computer graphics, not Cringing Geriatrics), as your eye, your sense of composition and the use of colours etc will be nicely developed already.
By necessity the following is a brief nuts and bones rundown.
Step mumero Uno: Download the free program
anim8or.
http://www.anim8or.com/main/index.html
And join their forum. They are mainly kids but there are some who will give you good mature advice.
Do all the tutorials you can. They are available at anim8or.com and also here as well:
http://www.animanon.com/
This will give you a taste for whether you really want to do it. Anim8or lets you make 3d models (objects) which you can turn into 2d artwork. It is simple and it is cheap (free).
Think of yourself as a puppeteer, as a set designer, as a dress maker, as a lighting consultant, director and photographer.
After you have had a play with anim8or for a few weeks (get up every morning before work at 5.00 oclock and start on it, print out the manual and lug it around) do the Joan of Arc tutorial. With the technique explained in the Joan d'Arc tutorial you can make anything (well
almost anything).
http://www.3dtotal.com/ffa/tutorials/max/joanofarc/joanmenu.php
Hint: in anim8or hold the 'shift' key down to start your line. (or first 'edge' as it is called.)
You then need to learn how to put
textures on your models. To do this you need a texturing program. Start with
UV mapper classic- a free program. This will let you put any graphic on your 3d object. (The object being the support you are putting the 'skin' on.)
http://www.uvmapper.com/
Anim8or is great for modelling but difficult for rendering compared to other programs. (Rendering is equivalent of taking a photograph of the 3d scene you have made). So when you want some quaility stuff (ie Renders) go to
Carrara.
You can buy Carrara on special occasionally so keep an eye out for it
.
http://www.daz3d.com/i/software/carrara?_m=d
Carrara will let you make wonderful pictures of your textured anim8or meshes. It's not the best renderer around but it certainly is value for money.
Join this forum and ask questions
http://forum.daz3d.com/viewforum.php?f=66
They are friendly. If they tell you to read the manual, say you already have, but can they explain it
properly please.
About this time (or before) I would consider purchasing a
Wacom tablet. Better than drawing with a mouse! And if you are lucky you will get a copy of Photoshop Elements, which is adequate to get you up and running adjusting your renders and your textures. It's the little sister of Photoshop which myself and most people can't afford.
So by now you should have been working in CG for about 12 months. You will be 1/3rd of the way there.
Now that you have learnt how to make your own people and props in anim8or, how to texture them in Uvmapper, and how to rig them in Carrara (Rigging means you put bones in them like a real skeleton to operate the meshes -ie pose them) it is time for you to think about going to the darkside.
The darkside? Hmmm....This means that you can now start to use premade content that you either buy or get given by kind vendors. It might take you three days to make a character in anim8or/ carrara, but if you use premade content it will take you a microcosm of time.
The downside? You will be using the same characters as every other tom dick and mary does.
That's why you have already spent a year making your own stuff (I spent two and half). That means you can bend and twist and retexture to your hearts content so these pre made content will become your own.
And if you can't find what you want for your illumination, you can make it. (Most people can't which is sad for them)
Now it' about time you bought Poser 8.
Poser 8 comes with a zillion bits of content that you can use in Carrara. It comes with about twenty ????? human characters that you can deform to your hearts desire....
Poser was originally made for artists so that they didn't have to hire models to paint from. What goes around, comes around!
Any questions so far??
No,? Good!
It's a long process, but bear in mind (bare?) that a friend of mine studied at the Bauhus or similar and she spent a year pushing around coloured bits of paper before she was allowed to pick up a paintbrush.
The last thing to do is to figure how to make your renders not look like CG.
Hard to do.
A few hints - in Carrara drop all ambient lighting and take away the default light, instead drop a bulb in the scene right in f ront of your characters face. This will give interesting shadows immediately.
In Photoshop elements learn how to use Smart objects.
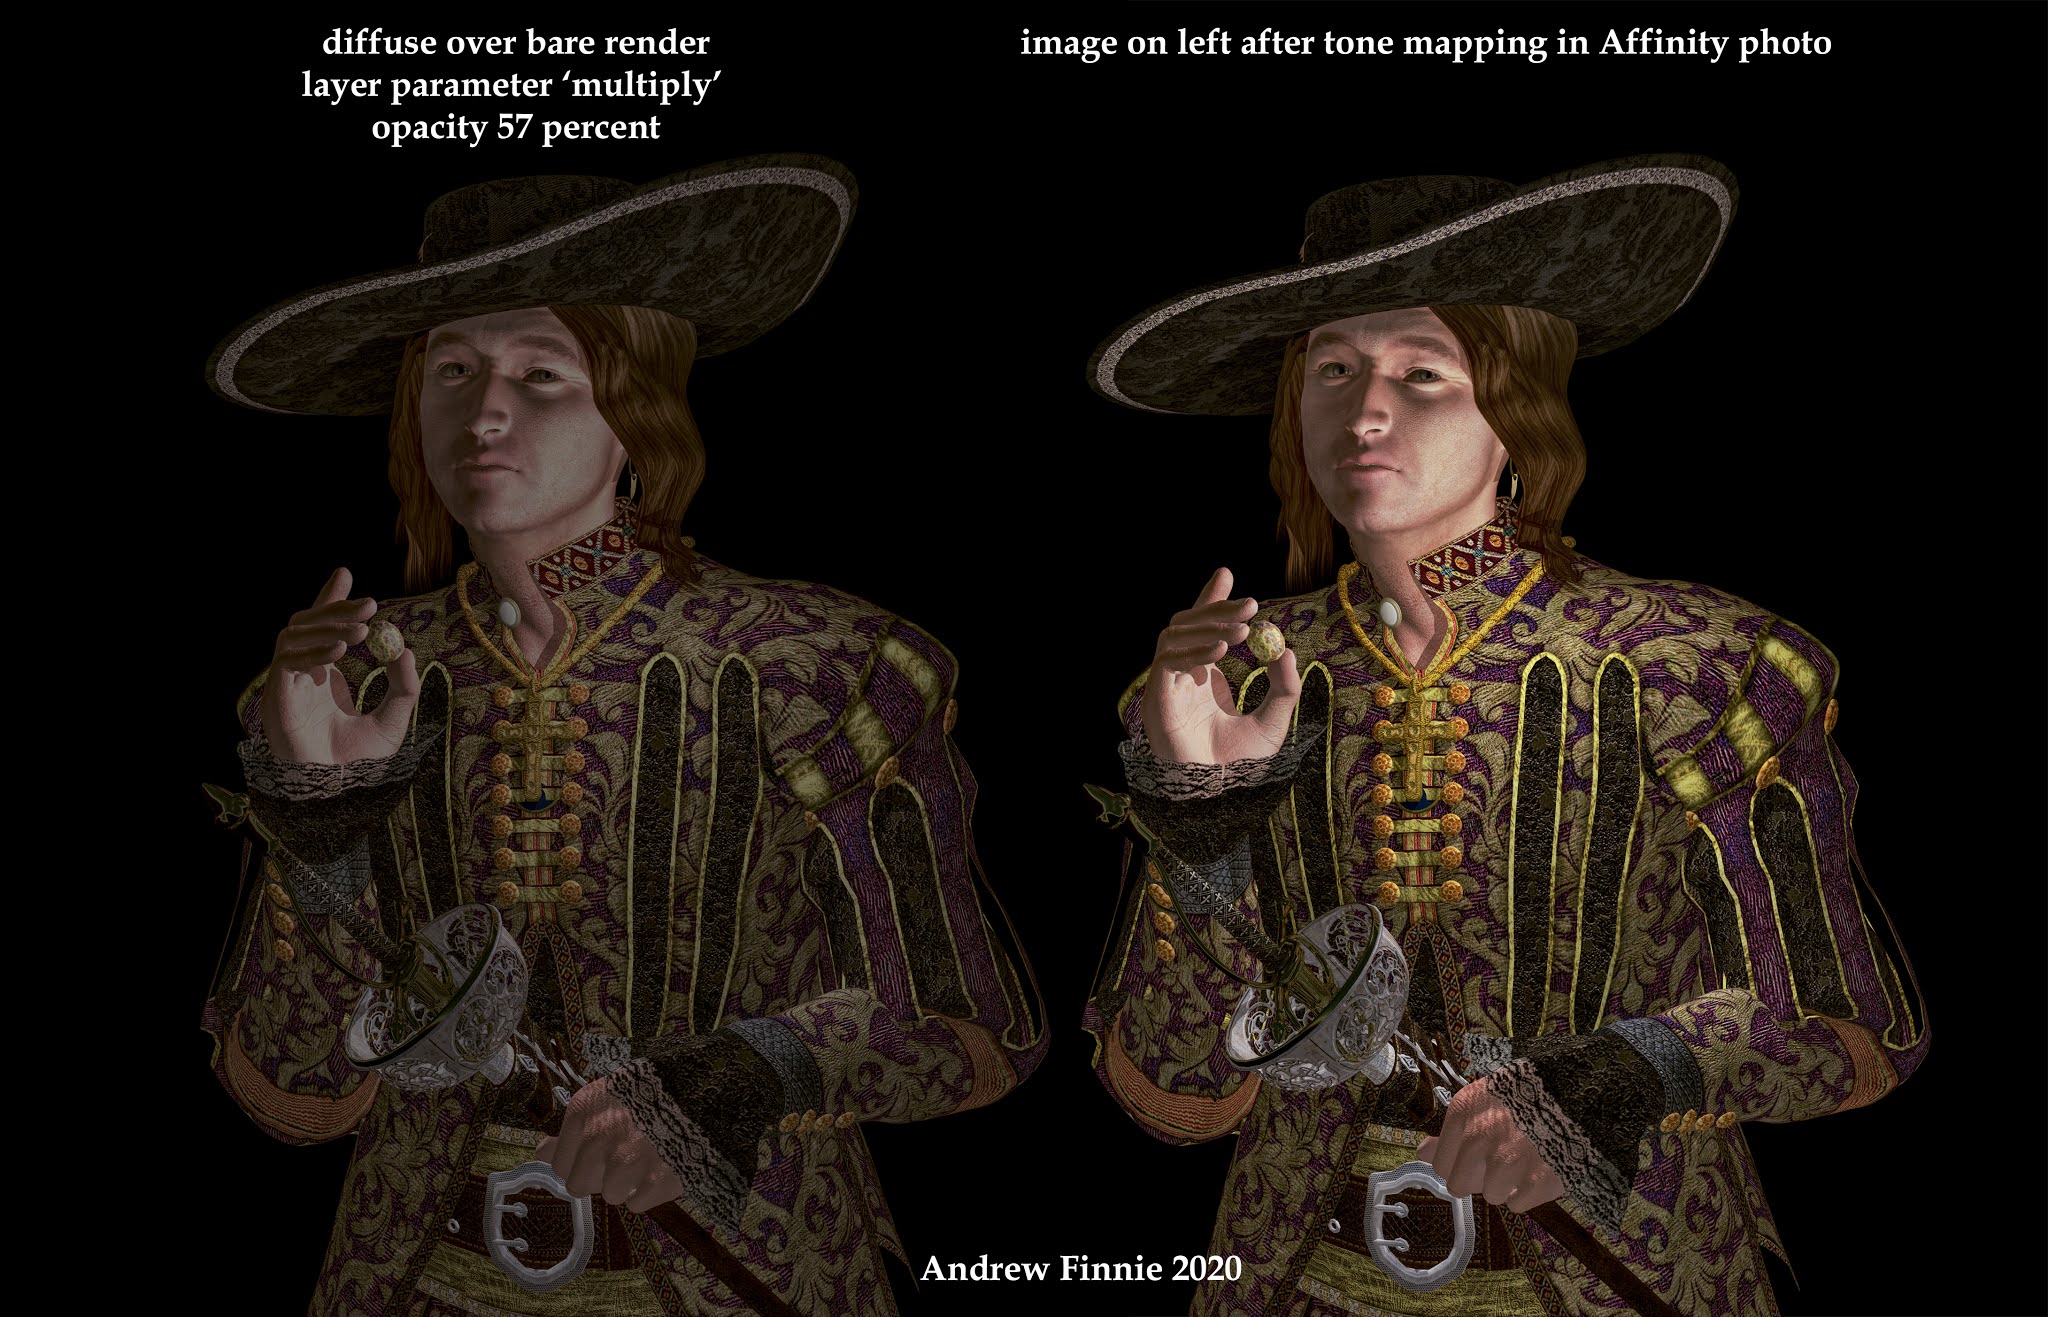
Also in Photoshop Elements learn how to use the Layering characteristics _ screen, soft light and overlay.
A good thing to do is copy your layer in Photoshop Elements , gaussian blur it, then set the characteristic of that layer to 'scene' You'll find a bloom or glow that you didn't ave before.
Remember that if you are working toward the print medium you need to make everything 300 dpi. I have 12 gig on my machine and a zillion processers. Anything less will slow your learning dramatically because you will be hanging around waiting for your 'renders' to appear.
Finally CG is by nature sterile in it's product - so make everything dirty, bumpy and assymetrical! To your renders add texture overlays and grunge, plus unifying coloured layers as you would an all over glaze to your paintings.
thanks for reading
I hope you are still keen!
cheers
Andrew Finnie
Footnote:
Programs I use
anim8or
carrara7
blacksmith 3d morph
blacksmith 3d paint
photoshop elements 7
uvmapper pro
stitchwitch
poser 8
painter ix - which is currently free.